Drawing with chocolate

Drawing with chocolate is a really simple way to decorate. If you are afraid of fondant, try this – you can still get really creative and it’s kind of a neat way to make characters some to life…not to mention it’s delicious.
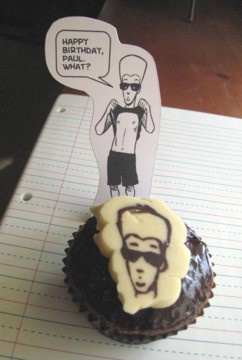
It was my friend Paul’s birthday, and I knew I was going to make cupcakes but I wanted to do something different. Since he draws a comic called Cool Jerk, I thought it’d be neat surprise to take one of his characters and draw it in chocolate. I hadn’t done anything like that before, so I just figured it out on the fly. This is how I did it:
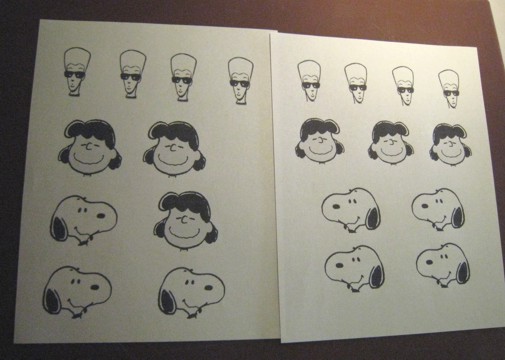
I printed out a picture of the character: Armpit, as well as a few others you might recognize. Then reversed the images in photoshop – why? Because I knew that I was going to flip the chocolate when it was done and I wanted it to read correctly. Trust me, this is going to work out…
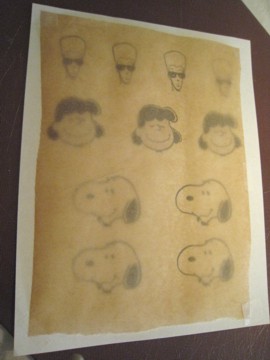
I taped a piece of parchment on top, then I simply melted some chocolate chips, put it in a piping bag and went to work. If you don’t have a piping bag, use a ziploc, but just make sure you don’t cut the corner off too big, you want a FINE LINE, so the smaller the end, the better the control.
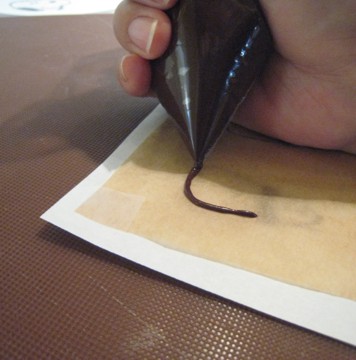
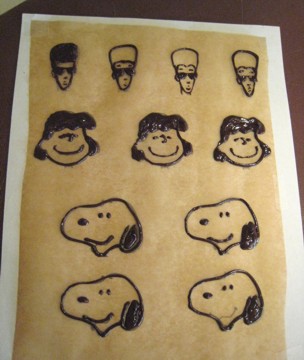
Here’s where I realized I had made a mistake. Armpit’s lineweights were a bit too delicate to work with the melty chocolate. However, the other were a lot easier. I had done Snoopy before in fondant, so the shape was familiar anyway. And Lucy was really easy since half of it was black anyway – note for next time, do a character with a lot of shading.

I let the chocolate dry, then melted some white chocolate and put that in a piping bag. I piped a thick layer over the chocolate – be careful, if the chocolate lines aren’t totally dry, they will smear. Also be wary of air pockets, they will show up when you turn it over.
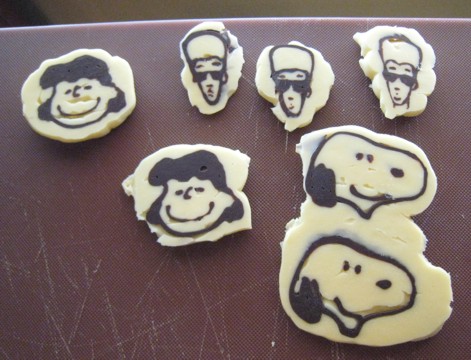
Put the chocolate in the freezer for a few minutes, when solid, just slide them off the parchment, turn them over and you should see your work in chocolate form!
There are so many possibilities with this, just remember, try and pick something familiar, that way if you screw up, people will still recognize the character, and try and pick something with thicker line weights. It’ll make your life easier, trust me.
The Baby’s birthday is next month and it is to be a full blown Batman party. I see the future and it looks like Batman piped in chocolate on cupcakes. But how does Batman feel about chocolate anyway? Hm…Maybe not.
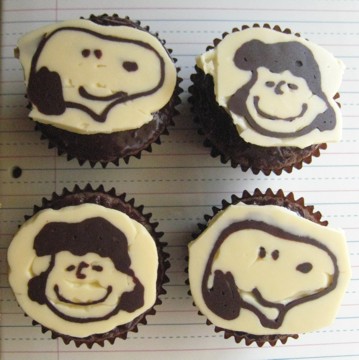
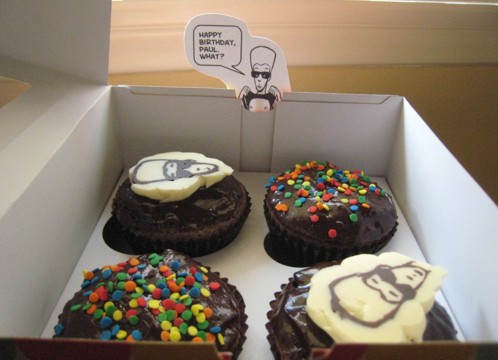


These are so neat.
hi justjenn!
i found you from your comment on bakingbites.
this is such a cool site…love this tutorial…can you please let me know what piping tip (brand etc) that you have pictured on this post.
thanks…i have bookmarked your blog!!!
OK, THAT is awesome, and now I am not scared of drawing! Freehand=no go, but tracing=within the realm of possibility!
@linda
Personally I like really small tips #2 or #3, you still want enough to come out too. However in this case I just used a ziploc because I wanted a verrrry small line with a lot of control. So whatever you are most comfortable with. I say try both, you never know it depends on the project.
What a great idea! Looks fabulous.
wow! i never would have thought that was how you could do that- they look so well done, so perfect. maybe i could even do it …(she says, wringing her hands and wondering….)
I have to say, that is a seriously cool idea. I have seen drawing with chocolate but I have never seen the idea of backing the drawing with white chocolate. That is truly inspired. Thank you, Jenn!
This is super! My daughter has asked for a “Yellow Submarine and Ringo” cake for her birthday. It’s in August, but I figured I should start practicing now. I’m going to give this method a try!
It is a real pleasure for me to visit your blog and to enjoy your excellent post here. I like that so much. I understand that you paid much attention for those posts, as all of them make sense and are very useful. Thank you for sharing. I can be very good reader & listener. Appreciate your work!
hye….very creative ownwork…well done!
If you desire to improve your experience only keep visiting this site
and be updated with the hottest news update posted here.
Excellent post. I was checking continuously this blog and I’m impressed!
Very helpful info specifically the last part 🙂 I care for such
info a lot. I was seeking this particular info for a long time.
Thank you and best of luck.
I every time spent my half an hour to read this weblog’s articles everyday along with a mug of coffee.
I do consider all of the ideas you’ve presented for your post.
They are very convincing and can definitely work. Still, the posts are very quick
for newbies. May you please extend them a little from subsequent
time? Thank you for the post.